What do you want to modify?
- Update layout: Adjust colors, headlines, or visual structure.
- Add content to an existing Summary Board.
- Create a new Summary Board.
- Modify the document card
- Modify the Admin tab
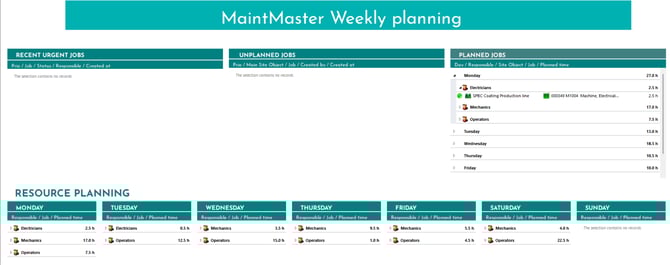
Summary Boards are built from a redesigned document card connected to a summary page, which displays selections, diagrams, or KPIs.
If you want the Summary Board configuration installed in your MaintMaster system, please contact support for a quote.
Update layout
Use this option to adjust colors, headings, or the visual structure.
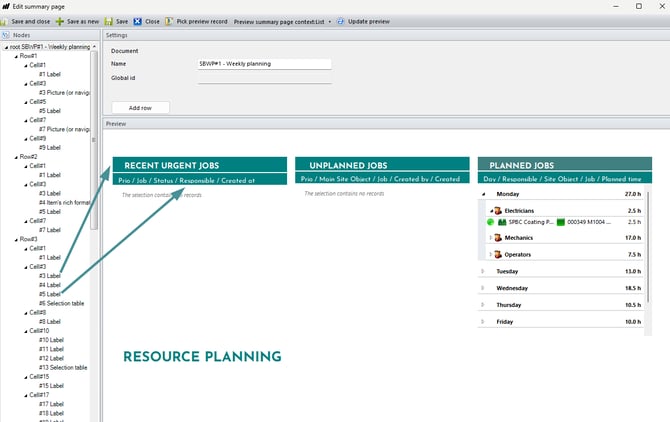
1. Open the Summary page you want to edit
2. Select the control you want to modify
(The control “Labels” are used for colors and text.)
3. Save and close
Add content to an existing Summary Board.
1. Create a selection showing the information you want to display.
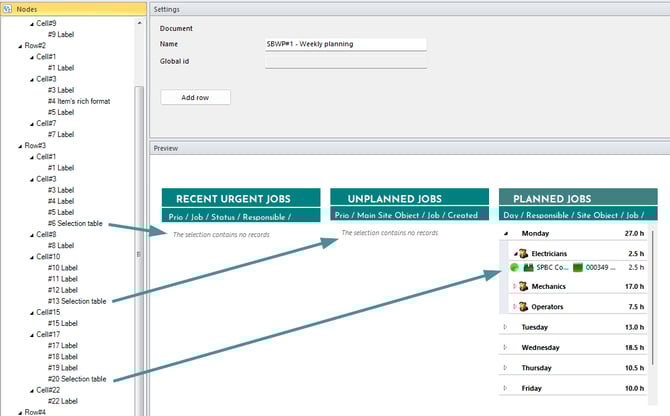
2. Open the Summary page you want to edit.
3. Replace or add the new selection to the Summary Board.
Create a new Summary Board.
1. Modify the document card to remove unnecessary tabs or properties from the standard layout.
(See the sections “Modify the Document Card” and “Modify the Admin Tab.”)
2. Create a Summary page with the desired selections and KPIs.
3. Create a new document category and connect it to the new summary page and card layout
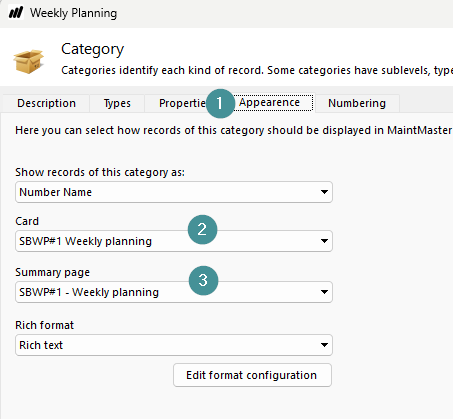
How to add the card layout:
- Add a new document category and open the "Appearance" tab.
- Switch to the new Card layout
- Then select the new Summary Page.
4. Inactivate the document category.
5. Create or edit a selection so you can access the new Summary Board.
6. Add or create a start page panel so you can access the Summary Boards from the start page.
To display on the start page:
- If needed; create a new start page, caption named “Summary Boards.”
-
Add content:
-
Link to a selection (e.g., Weekly Planning)
-
Add link text (e.g., Weekly Planning Dashboard)
-
Click OK
-
-
Assign the “Summary Boards” role.
-
Save and close.
Modify the document card
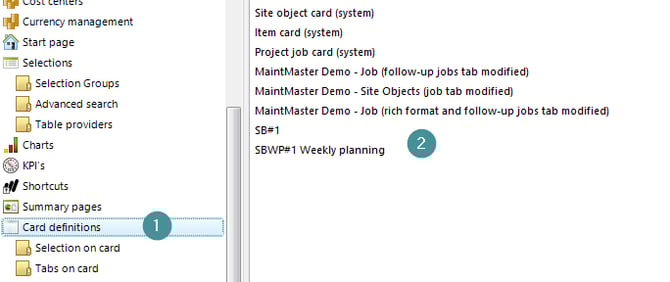
1. Go to "Card definitions"
2. Open the existing Summary Board card (commonly named SB#).
3. Copy the code from <view>

4. Create a new document card
5. Paste the copied code directly after the following code string. <form class=".FormItemCard" global_id="----" nice_name="SBWP#1 Weekly planning" item_type="Document">
(as highlighted in the image below)
6. Change the name of the card → nice_name="(new form)"
7. Verify the item type is Document → item_type="Document"
8. Save and close

Modify the Admin tab
If you’ve copied a Summary Board but don’t want to keep the existing tabs under the Admin tab, you can remove or replace them with other selections.
💡 Tip: Test these changes in your sandbox first.
Remove a Tab
1. Go to Card Definitions.
2. Open the existing Summary Board card (commonly named SB#).
3. Locate the tab definition, e.g.:
| <tab caption="URGENT JOBS THIS WEEK"> <control name="cx330" class=".ControlListMapper" argument="532008020" width="Full" /> </tab> |
4. Delete the code
Change selection
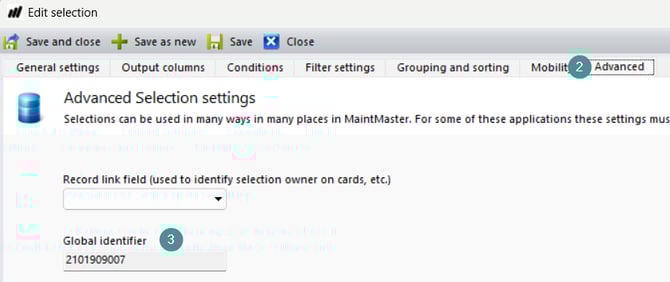
1. Open the selection that you want under the admin tab on your document card
2. Go to the tab "Advanced"
3. Copy the "Global identifier"
4. Go to "Card definitions"
5. Open the existing summary board card often named "SB#"
6. Find the code that defines the tab. Example
| <tab caption="URGENT JOBS THIS WEEK"> <control name="cx330" class=".ControlListMapper" argument="532008020" width="Full" /> </tab> |
7. Change the name of the tab. <tab caption="URGENT JOBS THIS WEEK">
5. Paste in the the Global identifier argument="532008020"