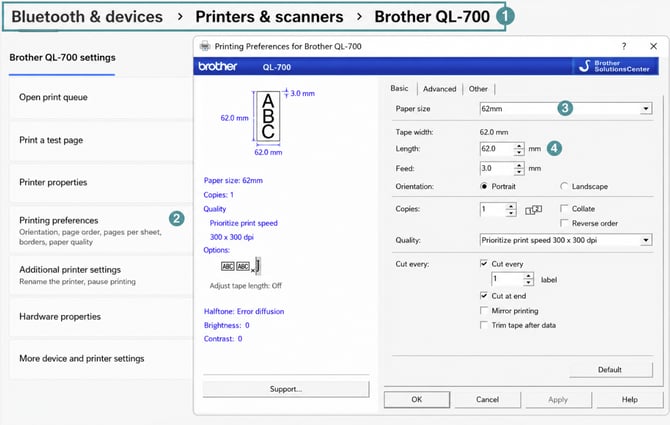
Configure the label size in the printer settings
Set the label size through your computer's settings for the printer you want to use.
This makes the change permanent until you change the setting again. If you change the size only in the print preview, the setting may be lost before the next print job.
- Open the printer settings on your computer.
- Go to Printing Preferences.
- Select the label size. The printer will display the sizes available for your printer model.
- If the label paper is supplied as a continuous roll without a fixed label length, enter the desired length.
Note: If you need help configuring your label printer, contact your IT department. Maintmaster Support does not provide support for printer-specific settings.
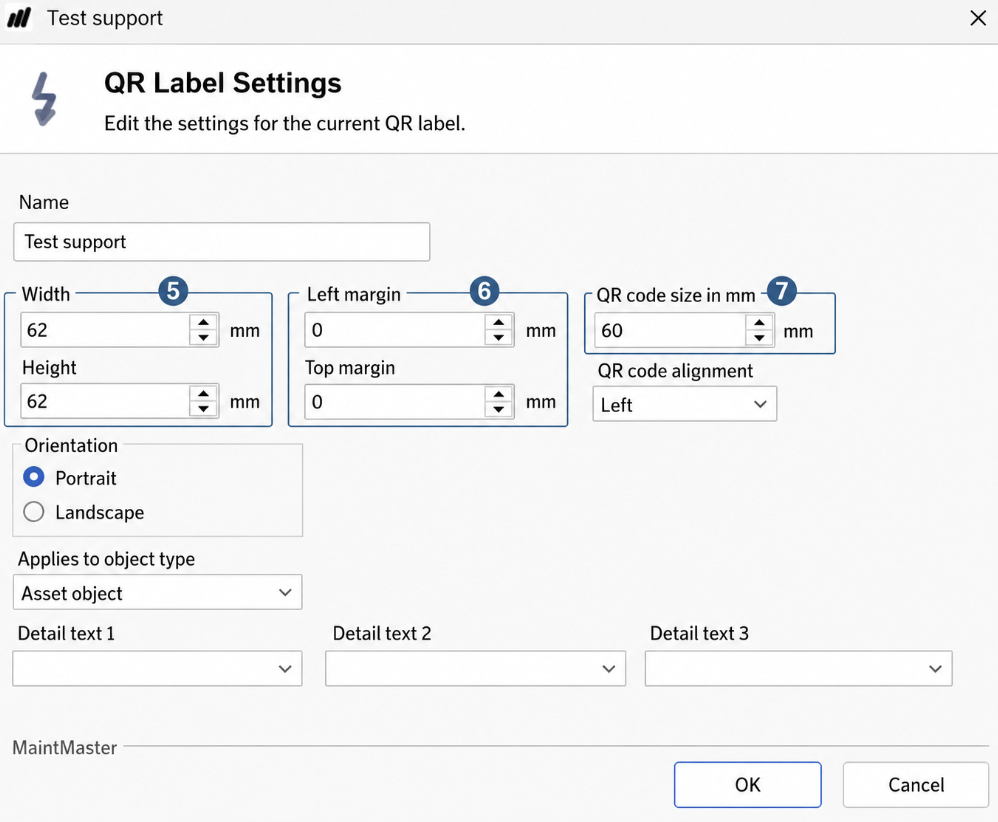
Configure the QR label size in Maintmaster
After configuring the printer, adjust the QR label in Maintmaster to match the printer settings.
Go to System settings → QR labels to edit existing labels or add new ones.
- Enter the label size. It must match the size configured in the printer settings.
- Set the margin to 0. If you want the print to be centered, configure the appropriate margins through the printer.
- Enter the desired QR code size. The QR code cannot be larger than the label.
Note: You may need to make several test prints and adjust the settings until you achieve the desired label size and format.