1. Creating a work order
2. Creating and saving the work order card
3. Understanding the work order status
4. Filling in the work order details
5. Work order tabs
6. Troubleshooting
When to use this
Use this guide when you need to:
-
Create a new work order in Maintmaster.
-
Assign work to a person or group.
-
Track planned work, time reporting, and documentation.
-
Link work orders to assets, tickets, or other work orders.
1. Creating a work order
There are several ways to create a work order in Maintmaster. The most common methods are described below.
-
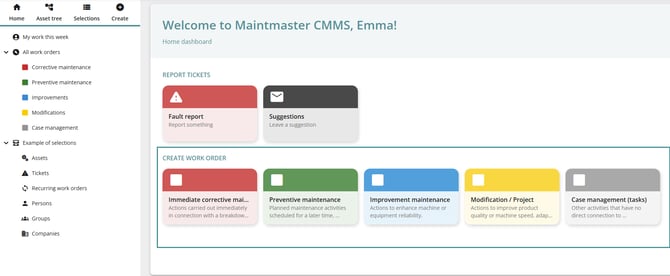
Create from the homepage
From the homepage, you can create a work order directly by selecting one of the available categories.
This is often the fastest way to create a new work order.
-
-
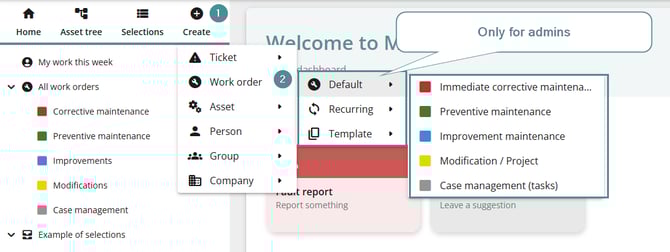
Create from the Quick Menu
You can also create a work order from the Create button in the Quick Menu.
If you are an administrator, you can choose the work order type:
-
Default
-
Recurring
-
Template
This option is only available to administrators.
-
Create from other objects
Work orders can also be created from other areas in the system, such as:
-
Assets
-
Ticket cards
-
Selections or lists showing work orders
2. Creating and saving the work order card
In this example, the work order is created from the homepage.
To create a work order, only one field is required:
-
Work order name
When you enter a work order name, the Save option becomes available.
You must save the work order card before all features become available.
After saving, additional sections appear, including:
-
Comments
-
Checklist tab
-
Document tab

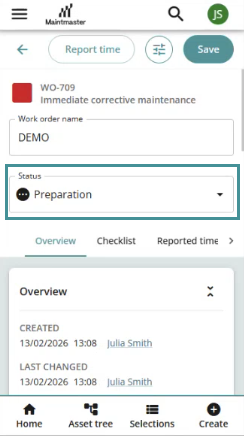
3. Understanding the work order status
At the top of the work order card there is a stepper showing the current status of the work order.
You can change the status using the Status dropdown field.
-
In the web interface, this appears as a stepper with a dropdown.

- In the mobile app, the status is shown as a dropdown list.
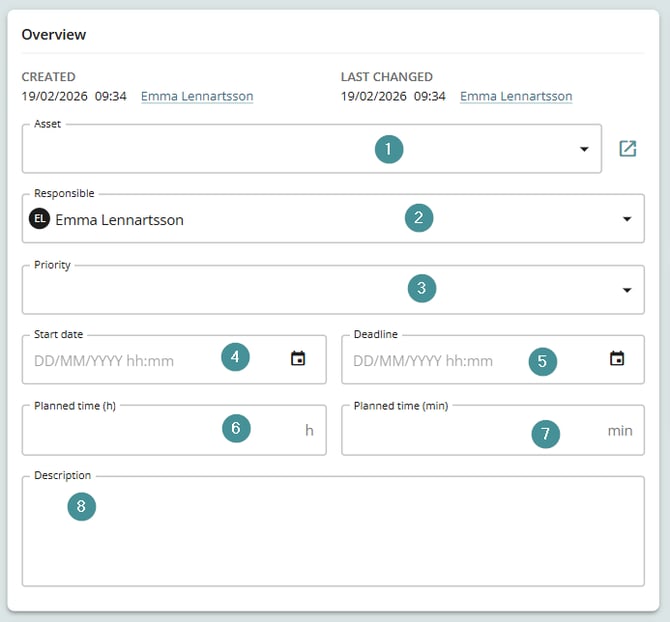
4. Filling in the work order details
After creating the work order, you can complete the remaining information.
1. Asset
Select an asset from the dropdown list or use the asset picker.
2. Responsible
Assign a person or group responsible for the work.
3. Priority
Set the priority level of the work order.
4. Start date
5. Deadline
6. Planned time (hours)
7. Planned time (minutes)
8. Description
Add a description of the work that should be performed.
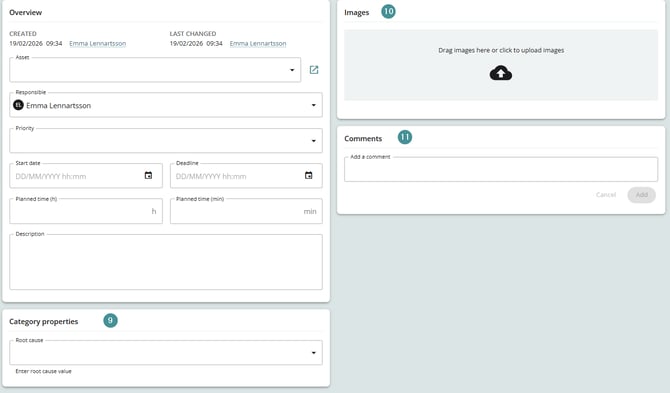
Additional information on the work order card
The work order card also includes several additional sections.
-
Category properties (9)
-
You can add category-specific properties depending on the selected category.
-
Read more here about How to create a property
-
Images (10)
-
Images can easily be added to the work order.
-
To upload images:
-
Drag and drop files onto the card.
-
-
-
Comments (11)
-
The comment section allows users to communicate directly on the work order card.
-
Users can write simple text messages.
-
Comments do not generate notifications, so users must check them manually.
-
Users can edit or delete their own comments.
-
Administrators can delete any comment.
-
-
The comment section saves automatically, so you do not need to press Save on the work order card.
5. Work order tabs
The work order card contains several tabs for additional functionality.
Checklist
-
A checklist can be added to structure tasks within the work order.
You must save the work order first before creating a checklist.
Here is detailed instructions to Create a checklist
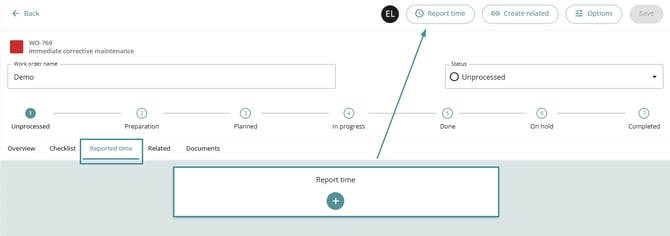
Report time
-
-
If no time has been reported, a Report time button will appear.
-
This works the same way as the Report time button in the top menu.
-
-
To report time
1. Click Report time.
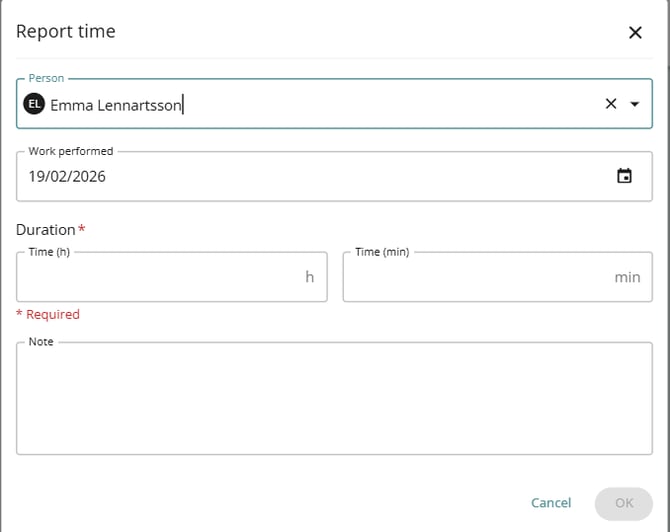
2. A new card will open where you enter:
-
-
Person
Defaults to the current user. -
Work performed
Defaults to today’s date. -
Duration
Enter hours and minutes. -
Note
Add additional information if needed.
-
After reporting time, the entry will appear in the Reported time tab.
-
In the Reported time tab
-
All reported time is summarized for the work order.
-
Administrators can edit or delete reported time entries.
-
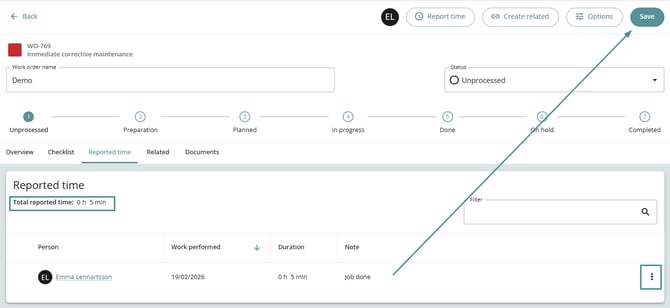
Always save the work order card after adding reported time.
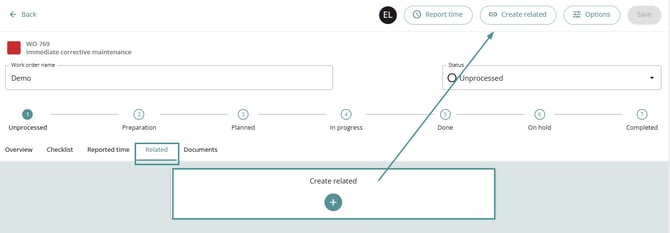
Create related
-
You can link the work order to other work orders or tickets in the system.
-
You can access this from:
-
The top menu
-
The Create related button in the tab
-
-
Link an existing item
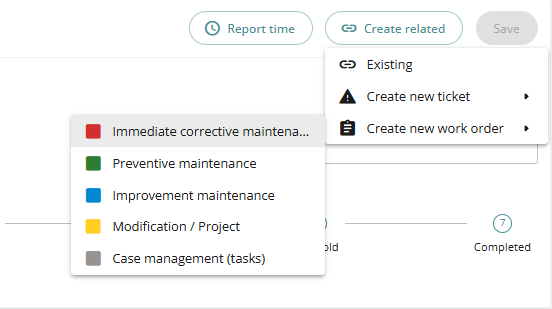
1. Click Create related.
2. Select Existing.
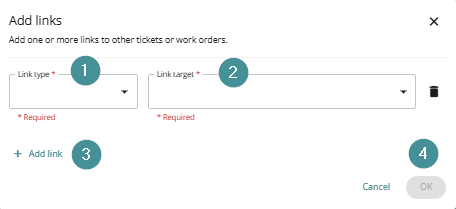
3. Fill in the following:
-
Link Type – Defines the relationship type.
-
Link Target – Select the work order or ticket to link.
4. Click Add link to create additional links if needed.
5. Click OK.
-
Create a new ticket
-
You can also create a new ticket directly from the related tab.
-
This works similarly to creating a work order.
-
Related tickets will appear in the Overview tab above images.
-
Create a new work order
-
When creating a related work order, a quick-add dialog opens instead of a full card.
-
Steps:
-
-
Select Link type.
-
Enter a work order name (required).
-
Fill in the relevant information.
-
Save the work order.
Add documents
-
Documents can be uploaded to the work order so that other users can download and access them.
-
Examples include:
-
-
Manuals
-
Instructions
-
Reports
-
Images
-
6. Troubleshooting
I cannot create a checklist
Make sure the work order card has been saved. The checklist feature becomes available only after saving.
I do not see reported time
Ensure the time entry was saved and check the Reported time tab.
Comments are not notifying users
Comments do not generate notifications. Users must manually check the comment section.