Step 1: Create a selection showing reported time
Since the summary page will use a reported time selection, you must create a new selection (not a sub-selection).
1. Go to Settings → System settings → Selections.
2. Click "Add" → Job → Reported times.

3. Enter a Name, for example:
Summary pages – Job – Reported times
Add a description, such as:
Hidden selection used by Demo Summary Pages.
4. Under Group, choose (no group – hidden).

5. Go to the "Output columns" tab and include these columns (in order):
-
Time Report, Person
-
Time Report, Description → Appearance: Show value as row
-
Time Report, Date
-
Time Report, Duration
Remove any unnecessary columns.

6. (Optional) To show jobs only from specific categories:
-
Open the "Conditions" tab.
-
Add condition:
Category → Include specific items → check the boxes for your desired categories.

7. Go to the "Advanced" tab
8. Select "Record link field" →Job
9. Save & Close the selection.

Step 2: Create the summary page
1.Go to Settings → System settings → Summary pages.
2. Click "Add" → Job.

3. Name your page, for example:
-
MaintMaster Demo – Job Summary with Reported Time.
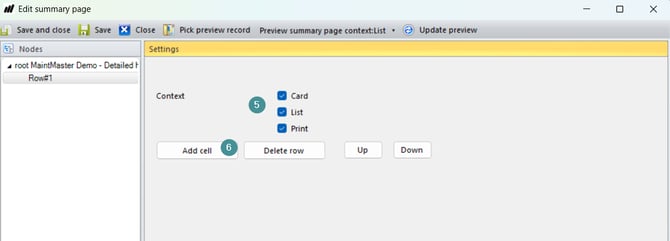
4. Click "Add Row".

5. Check all three contexts: Card, List, Print.
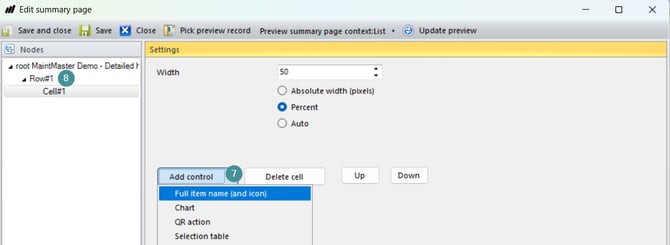
6. Click "Add Cell"
7. Select "Add Control" → Full Item Name (and icon)
8. Return to the root level of the page layout.
9. Click "Add Row" again.
10. Check all three contexts.
11. Click "Add Cell"
12. Select "Add Control" → Label.
13. Set Height = 30 to create spacing below the header.
14. Go back to root again.

15. Click "Add Row".
16. Click "Add Cell".
17. Select "Add Control" → Item’s Rich Format.
18. Return to Row #3.
19. Click "Add Cell".
20. Select "Add Control" → Selection Table.
21. In Global Selection ID, search for and select your earlier selection:
Summary pages – Job – Reported times.
22. Click "Save and Close"
Your summary page is now active and displays reported time directly on the job card, along with job descriptions and related information.

If the selection displays many rows, you can adjust the Grid height for better visibility.
Step 3: Activate the summary page
To make the new summary page visible on job cards, link it to a job category.
1. Open Settings → System settings
2. Go to Jobs → Categories.
3. Open the Category where you want to add the summary page.
4. Go to the "Appearance" tab.
5. In the "Summary page field", select the page you created.
6. Click "OK", then close System settings.

Your summary page is now active and displays reported time directly on the job card, along with job descriptions and related information.